notOSU! Configuration Guide
Getting Started with notOSU!
Welcome to the setup guide for notOSU!, a tool designed for creating dynamic storyboards in osu!mania. This guide will walk you through the process of downloading and configuring notOSU! for your storyboard projects.
Step 1: Download the Files
Start by downloading the latest release of notOSU! from the official repository. Make sure to select the most recent version for the latest features and improvements.
Step 2: Installation
Once you have downloaded the files, you need to integrate them into your storyboard environment:
- Locate the
/scriptLibrarydirectory in your storyboard project. - Extract and move the downloaded folders from notOSU! into the
/scriptLibrarydirectory.
With these steps, the initial setup for notOSU! is complete.
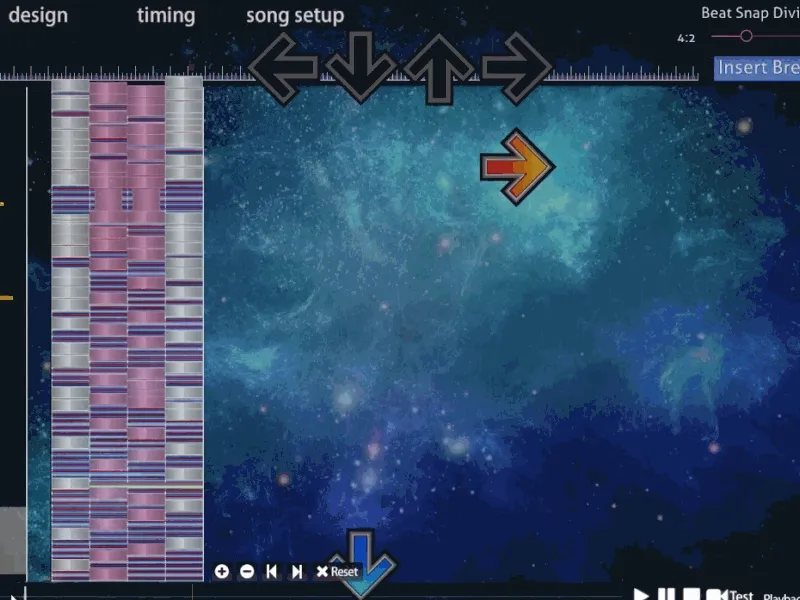
Configuring a Playfield for Storyboarding
Setting up a playfield and notes in notOSU! involves three key components: layers, a playfield instance, and a DrawInstance. Here’s how to do it:
Required Components:
- Layers: Create separate layers for receptors and notes within your storyboard.
    var receptors = GetLayer("r");
var notes = GetLayer("n");- Playfield Instance: Establish a playfield instance to manage the gameplay area and note mechanics.
    Playfield field = new Playfield();
    field.initilizePlayField(receptors, notes, starttime, endtime, width, height, receptorWallOffset, Beatmap.OverallDifficulty);
field.initializeNotes(Beatmap.HitObjects.ToList(), Beatmap.GetTimingPointAt(starttime).Bpm, Beatmap.GetTimingPointAt(starttime).Offset, isColored, sliderAccuracy);- DrawInstance: Utilize a DrawInstance to control how notes are drawn and animated on the playfield.
    DrawInstance draw = new DrawInstance(field, starttime, scrollSpeed, updatesPerSecond, OsbEasing.None, true, fadeTime, fadeTime);
    draw.drawViaEquation(duration, NoteFunction, true);
Example Setup:
Below is an example script to guide you through configuring a playfield in notOSU!:
// Generate function in a storybrew script
public override void Generate() {
var receptors = GetLayer("r");
var notes = GetLayer("n");
// General values
var starttime = 0; // the starttime where the playfield is initialized
var endtime = 257044; // the endtime where the playfield is nolonger beeing rendered
var duration = endtime - starttime; // the length the playfield is kept alive
// Playfield Scale
var width = 250f; // widht of the playfield / invert to flip
var height = 600f; // height of the playfield / invert to flip -600 = downscroll | 600 = upscropll
var receptorWallOffset = 50f; // how big the boundary box for the receptor is 50 means it will be pushed away 50 units from the wall
// Note initilization Values
var sliderAccuracy = 30; // The Segment length for sliderbodies since they are rendered in slices 30 is default
var isColored = false; // This property is used if you want to color the notes by urself for effects. It does not swap if the snap coloring is used.
// Drawinstance Values
var updatesPerSecond = 50; // The amount of steps the rendring engine does to render out note and receptor positions
var scrollSpeed = 900f; // The speed at which the Notes scroll
var fadeTime = 150; // The time notes will fade in
Playfield field = new Playfield();
field.initilizePlayField(receptors, notes, starttime, endtime, width, height, receptorWallOffset, Beatmap.OverallDifficulty);
field.initializeNotes(Beatmap.HitObjects.ToList(), Beatmap.GetTimingPointAt(starttime).Bpm, Beatmap.GetTimingPointAt(starttime).Offset, isColored, sliderAccuracy);
DrawInstance draw = new DrawInstance(field, starttime, scrollSpeed, updatesPerSecond, OsbEasing.None, true, fadeTime, fadeTime);
draw.drawViaEquation(duration, NoteFunction, true);
}
// NoteFunction is used to manipulate the pathway and a bunch of other things the note should do on their way to the receptor
// Please be warry that this is beeing run async so you need to keep thread safety in mind when working on complex Functions.
// You can use the progress to determin how far the note is in its cycle 0 = just start | 1 = ontop of receptor / finished
// Special flags for hold bodies exist
public Vector2 NoteFunction(EquationParameters p)
{
return p.position;
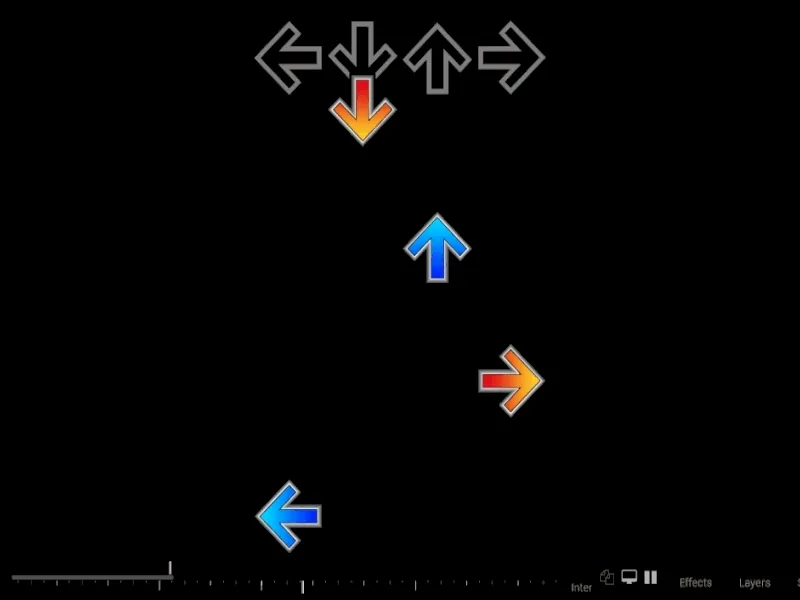
}When the code above is executed on the storybrew, it will look like this:
Hitlighting
Notosu! now includes hitlighting via storybpoard triggers. For this you need to set the Sample Set and Additions per column, left to right!
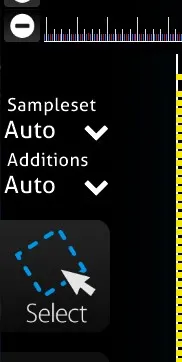
Starting left.
- Column 1 (Left Arrow) = Sampleset Normal | Additons Normal
- Column 2 (Down Arrow) = Sampleset Normal | Additons Soft
- Column 3 (Up Arrow) = Sampleset Soft | Additions Normal
- Column 4 (Right Arrow) = Sampleset Soft | Additions Soft
This should automatically make hitlighting work.
By following these steps, you can effectively set up your notOSU! Playfield and Notes, ready for creating engaging storyboards for osu!mania.